SpringBoot使用elasticsearch-java8.1.2客户端
java springboot elasticsearch
导入jar包
<dependency>
    <groupId>co.elastic.clients</groupId>
    <artifactId>elasticsearch-java</artifactId>
    <version>8.1.2</version>
</dependency>
开始编写代码
注入esClient的Bean
因为我们这个客户端对象需要多次使用,每次实例化再配置就很不方便。所以我们可以写一个Configuration来自动注入springboot。
先来理一下我们需要干什么事情:
- 创建
Configuration类 - 使用
ConfigurationProperties实现自动读取yaml配置(因为host地址是容易变的)
/**
 * @author CHENPrime-coder <chenbprime@outlook.com>
 */
@Configuration
@ConfigurationProperties(prefix = "es.config")
public class ElasticsearchConfig {

    // 需要动态变化的host地址
    public String esServerAddress = "127.0.0.1";

    public String getEsServerAddress() {
        return esServerAddress;
    }

    public void setEsServerAddress(String esServerAddress) {
        this.esServerAddress = esServerAddress;
    }

    // esClient的Bean
    @Bean
    public ElasticsearchClient esClient() {
        // 1. 构造RestClient,端口是9200
        RestClient client = RestClient.builder(
                new HttpHost(esServerAddress, 9200)
        ).build();
        // 2. json转换配置,这里使用Jackson
        ElasticsearchTransport transport = new RestClientTransport(
                client, new JacksonJsonpMapper()
        );
        // 3. 构造ElasticsearchClient
        return new ElasticsearchClient(transport);
    }
}
修改application.yaml配置文件
使用yaml配置host地址,这里假设我们需要使用docker部署,所以修改为es-server(容器名)。
es:
  config:
    # 这里写上主机地址(host),也可以写ip地址(如:127.0.0.1)
    es-server-address: es-server
索引库操作
首先我们先在test包下创建测试类HotelIndexTest.java,开始测试客户端(Junit)。下面的代码中beforeAll方法和afterAll分别是初始化客户端和关闭客户端,使用原始的方式。这里我们使用springboot的自动注入esClient。
我们先把代码的基本框架写好,再去写具体的凭借条件并查询
@SpringBootTest
public class HotelIndexTest {

    // 注入esClient
    @Autowired
    static ElasticsearchClient esClient;

    // @BeforeAll
    // static void beforeAll() {
    //     restClient = RestClient.builder(
    //             new HttpHost("192.168.118.10", 9200)).build();
    //     ElasticsearchTransport transport = new RestClientTransport(
    //             restClient, new JacksonJsonpMapper()
    //     );
    //
    //     esClient = new ElasticsearchClient(transport);
    // }

    // @AfterAll
    // static void afterAll() throws IOException {
    //     restClient.close();
    // }

    // 创建索引库
    @Test
    void createIndex() throws IOException {
    }

    // 删除索引库
    @Test
    void deleteIndex() throws IOException {
    }

    // 判断索引库是否存在
    @Test
    void existsIndex() throws IOException {
    }

}
elasticsearc-java使用了大量的建造器模式,有各种各样的Builder。并且需要一定的
lambda基础,建议先学一下lambda再写代码
创建索引库
既然是创建索引库,并且上面也讲了需要用XXXBuilder来构造查询语句。所以我们需要使用CreateIndexRequest.Builder来创建索引库
创建索引库既可以用json字符串创建,也可以使用lambda的方式创建。这里我们先使用json演示,我们需要先创建一个常量类包装json字符串。这里的json写法和DSL的写法是一样的,由于本文的重心并不是DSL,所以这里就不赘述了
/**
 * @author CHENPrime-coder <chenbprime@outlook.com>
 */
public class HotelConstants {

    public static final String MAPPING_TEMPLATE = "{\n" +
            "  \"mappings\": {\n" +
            "    \"properties\": {\n" +
            "      \"id\": {\n" +
            "        \"type\": \"keyword\"\n" +
            "      },\n" +
            "      \"name\": {\n" +
            "        \"type\": \"text\",\n" +
            "        \"analyzer\": \"ik_max_word\",\n" +
            "        \"copy_to\": \"all\"\n" +
            "      },\n" +
            "      \"address\": {\n" +
            "        \"type\": \"keyword\",\n" +
            "        \"index\": false\n" +
            "      },\n" +
            "      \"price\": {\n" +
            "        \"type\": \"integer\"\n" +
            "      },\n" +
            "      \"score\": {\n" +
            "        \"type\": \"integer\"\n" +
            "      },\n" +
            "      \"brand\": {\n" +
            "        \"type\": \"keyword\",\n" +
            "        \"copy_to\": \"all\"\n" +
            "      },\n" +
            "      \"city\": {\n" +
            "        \"type\": \"keyword\",\n" +
            "        \"copy_to\": \"all\"\n" +
            "      },\n" +
            "      \"starName\": {\n" +
            "        \"type\": \"keyword\",\n" +
            "        \"copy_to\": \"all\"\n" +
            "      },\n" +
            "      \"business\": {\n" +
            "        \"type\": \"keyword\",\n" +
            "        \"copy_to\": \"all\"\n" +
            "      },\n" +
            "      \"location\": {\n" +
            "        \"type\": \"geo_point\"\n" +
            "      },\n" +
            "      \"pic\": {\n" +
            "        \"type\": \"keyword\",\n" +
            "        \"index\": false\n" +
            "      },\n" +
            "      \"all\": {\n" +
            "        \"type\": \"text\",\n" +
            "        \"analyzer\": \"ik_max_word\"\n" +
            "      }\n" +
            "    }\n" +
            "  }\n" +
            "}";
    public static final String USER_MAPPING = "{\n" +
            "  \"mappings\": {\n" +
            "    \"properties\": {\n" +
            "      \"info\": {\n" +
            "        \"type\": \"text\",\n" +
            "        \"analyzer\": \"ik_smart\"\n" +
            "      },\n" +
            "      \"email\": {\n" +
            "        \"index\": false,\n" +
            "        \"type\": \"keyword\"\n" +
            "      },\n" +
            "      \"name\": {\n" +
            "        \"type\": \"object\",\n" +
            "        \"properties\": {\n" +
            "          \"firstName\": {\n" +
            "            \"type\": \"keyword\"\n" +
            "          },\n" +
            "          \"lastName\": {\n" +
            "            \"type\": \"keyword\"\n" +
            "          }\n" +
            "        }\n" +
            "      }\n" +
            "    }\n" +
            "  }\n" +
            "}";
}
然后我们就可以开始写具体的搜索请求了
@Test
void createIndex() throws IOException {
    // 以ByteArrayInputStream读入字符串
    ByteArrayInputStream inputStream = new ByteArrayInputStream(USER_MAPPING.getBytes(StandardCharsets.UTF_8));

    // 实例化建造器
    CreateIndexRequest.Builder builder = new CreateIndexRequest.Builder();
    // 设置索引库的名字
    builder.index("user");
    // 使用json方式创建索引库
    builder.withJson(inputStream);
    // 构造请求
    CreateIndexRequest request = builder.build();

    // 使用esClient测试请求并返回结果
    System.out.println(esClient.indices().create(request).acknowledged());
}这里输出的acknowledged为true就说明索引库创建成功了,下面的acknowledged也同理
删除索引库
索引库的删除操作十分简单,我们只需要指定索引库名称就可以实现索引库的删除
@Test
void deleteIndex() throws IOException {
    DeleteIndexRequest.Builder builder = new DeleteIndexRequest.Builder();
    builder.index("user");

    System.out.println(esClient.indices().delete(builder.build()).acknowledged());
}
判断索引库是否存在
判断索引库是否存在也很简单,指定一个索引库名就可以了
@Test
void existsIndex() throws IOException {
    ExistsRequest.Builder builder = new ExistsRequest.Builder();
    builder.index("user");

    System.out.println(esClient.indices().exists(builder.build()).value());
}
文档简单操作
elasticsearch的文档操作比较麻烦,需要单独创建一个es文档的POJO(XXXDoc),这里创建一个HotelDoc的POJO这结构需要和创建索引库时的结构相同。
我们来分析一下特殊字段该怎么处理(其实也就一个特殊字段):
- location地理位置字段,这里由于Hotel原始POJO里面并没有这么一个字段,所以我们需要根据es中经纬度的写法来转换格式
/**
 * @author CHENPrime-coder <chenbprime@outlook.com>
 */
@Data
@NoArgsConstructor
public class HotelDoc {
    private Long id;
    private String name;
    private String address;
    private Integer price;
    private Integer score;
    private String brand;
    private String city;
    private String starName;
    private String business;
    private String location;
    private String pic;

    public HotelDoc(Hotel hotel) {
        this.id = hotel.getId();
        this.name = hotel.getName();
        this.address = hotel.getAddress();
        this.price = hotel.getPrice();
        this.score = hotel.getScore();
        this.brand = hotel.getBrand();
        this.city = hotel.getCity();
        this.starName = hotel.getStarName();
        this.business = hotel.getBusiness();
        this.location = hotel.getLatitude() + ", " + hotel.getLongitude();
        this.pic = hotel.getPic();
    }
}
现在索引库的映射写好了,现在我们需要编写基本的框架
/**
 * @author CHENPrime-coder <chenbprime@outlook.com>
 */
@SpringBootTest
public class HotelDocumentTest {

    @Autowired
    private IHotelService service;

    // es客户端自动注入
    @Autowired
    static ElasticsearchClient esClient;

    // 插入文档
    @Test
    void testAddDocument() throws IOException {
    }

    // 根据id获取文档
    @Test
    void testGetDocumentById() throws IOException {
    }

    // 根据id更新文档
    @Test
    void testUpdateDocumentById() throws IOException {
    }

    // 根据id删除文档
    @Test
    void testDeleteDocumentById() throws IOException {
    }

    // 批量导入文档
    @Test
    void testBulkDocument() throws IOException {
    }
}
插入文档
es客户端的文档插入操作。我们需要先根据基本的Hotel获取HotelDoc对象,这里使用封装好的service获取hotel。然后使用IndexRequest.Builder构造文档插入请求
@Test
void testAddDocument() throws IOException {
    Hotel hotel = service.getById(56227L);
    // 转换为文档类型
    HotelDoc doc = new HotelDoc(hotel);

    // 获取建造器
    IndexRequest.Builder<HotelDoc> builder = new IndexRequest.Builder<>();
    // 指定索引库名
    builder.index("hotel");
    // 设置文档id
    builder.id(doc.getId().toString());
    // 读入文档
    builder.document(doc);

    // 执行插入操作,获取result并打印
    System.out.println(esClient.index(builder.build()).result());
}
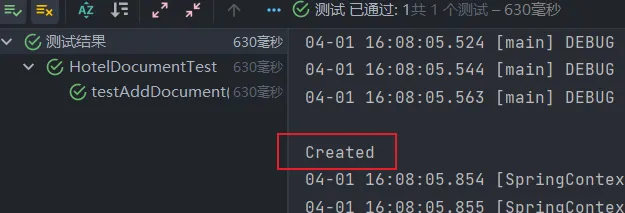
如果一切正常,那么将会输出如下内容

根据id获取文档
如果只需要根据id获取文档,那么只需要指定索引库名和id就行了,下面的删除也是一样。需要注意的是,id需要是String字符串类型。这里需要使用GetRequest.Builder建造器
@Test
void testGetDocumentById() throws IOException {
    GetRequest.Builder builder = new GetRequest.Builder();
    // 设置索引库名
    builder.index("hotel");
    // 设置文档id
    builder.id("36934");

    //								传入GetRequest	设置返回的对象类型
    System.out.println(esClient.get(builder.build(), HotelDoc.class).source());
}
获取成功的结果打印:

根据id更新文档
修改文档有两种方式
- 方式一: 全量更新,再次写入id一样的文档,就会删除旧文档,添加新文档
- 方式二: 局部更新,更新部分字段
这里使用第二种方式
更新文档需要使用UpdateRequest.Builder建造器,并指定id索引库名和文档对象(这里我有一个问题,UpdateRequest.Builder<HotelDoc, HotelDoc>中的两个泛型分别是什么意思?希望有大佬再评论区指出,感谢)
@Test
void testUpdateDocumentById() throws IOException {
    Hotel hotel = service.getById(36934L);
    // 转换为文档类型
    HotelDoc doc = new HotelDoc(hotel);
    // 修改数据
    doc.setName("修改酒店名字测试");

    //                    修改的类型  数据类型?
    UpdateRequest.Builder<HotelDoc, HotelDoc> builder = new UpdateRequest.Builder<>();
    // 设置索引库名
    builder.index("hotel");
    // 设置id
    builder.id("36934");
    // 读入文档对象
    builder.doc(doc);

    // 执行修改操作                                        修改类型         获取状态
    System.out.println(esClient.update(builder.build(), HotelDoc.class).result());
}
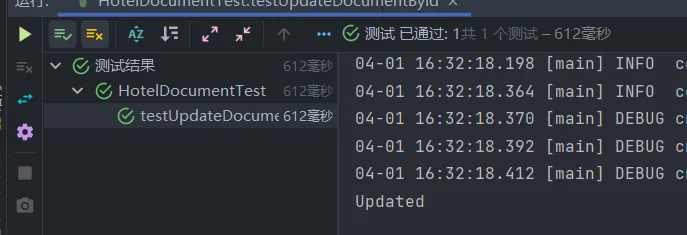
更新成功后的结果打印:

根据id删除文档
删除文档很简单,指定文档id和索引库名就好了。这里就不过多赘述了
    @Test
    void testDeleteDocumentById() throws IOException {
        DeleteRequest.Builder builder = new DeleteRequest.Builder();
        builder.index("hotel");
        builder.id("36934");

        System.out.println(esClient.delete(builder.build()).result());
    }
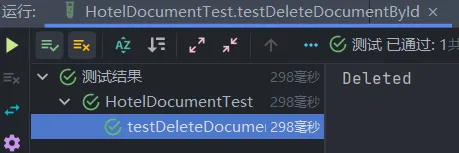
删除成功打印:

批量导入文档
批量导入文档就需要写一点lambda的语法了。其实也不难。只需要遍历然后放入请求建造器就ok了
@Test
void testBulkDocument() throws IOException {
    // 使用mybatis-plus获取所有的记录
    List<Hotel> list = service.list();

    BulkRequest.Builder builder = new BulkRequest.Builder();
    // 设置索引库
    builder.index("hotel");

    // 遍历记录
    for (Hotel hotel : list) {
        // 添加数据
        builder.operations(o -> o // lambda
                           .create(v -> v // lambda
                                   // 读入id
                                   .id(hotel.getId().toString())
                                   // 读入文档
                                   .document(new HotelDoc(hotel))
                                   // 设置索引库
                                   .index("hotel")
                                  )
                          );
    }

    // 执行批量插入,并获取是否发生了错误
    System.out.println(esClient.bulk(builder.build()).errors());
}
批量导入成功打印:

结语
由于本人第一次写这样的博客,所以可能有一些地方没有考虑到,希望有大佬可以指出问题。感谢
分享这篇文章